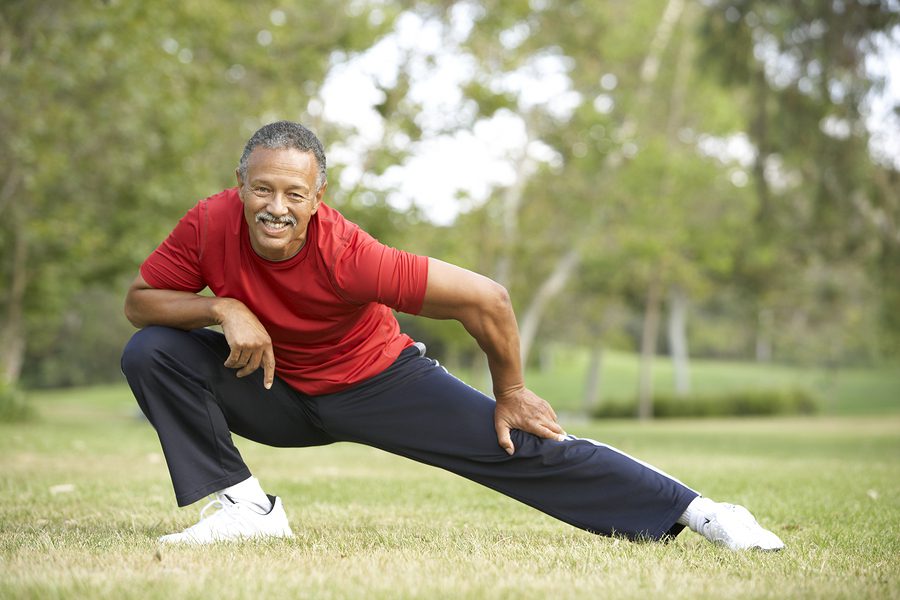
How Do You Stretch Yourself?

There are many ways to “Stretch Yourself”. Read a book that makes you think. Learn a new skill or language. However, in fitness, stretching yourself has a little different connotation. So, how do you stretch yourself?
Before the “How”, Let’s Get into the “Why”
Flexibility. For many people, stretching before or after a workout becomes a “necessary evil”, something they might have to do, but don’t want to do. Many people skip it altogether and therefore, stretching gets left behind with the other movements we don’t like in a workout like…burpees. But, just like mobility, flexibility is important to not only your work, but also you everyday life.
Muscles Are Like Rubber bands
Find 2 rubber bands, any size or thickness. Now, put one in your freezer and set your timer for a few hours. Leave the other on the counter. When the timer goes off, get the rubber band from the freezer and compare it to the one on the counter. Try pulling on the cold rubber band. Did it break? Pull on the other rubber band. Still supple, isn’t it? Muscle acts in a similar manner. When your muscles are “cold” meaning there’s no mobility work, stretching or warm-up before a workout, the chances are much greater for injury. Just like the frozen rubber band breaks under stress, so do your muscles.
OK, You’ve Convinced Me. What Do I Do? How Do I Stretch Myself?
Just like using mobility tools, we start from the bottom and go up the body. The following information and links are designed to help you stretch on your own. Use it to develop your own stretching program before and after workouts. A few rules:
- Start each stretch in a pose where you feel no tension at all. Then move to the point of GENTLE TENSION. Because it’s too easy to overstretch muscle, remember to err on the side of caution. LESS IS BEST.
- As you stretch, allow the muscle to naturally release tension.
- Stretching is not a timed event. The time you hold a stretch is dependent on the tightness of the muscle being stretched. Hold the stretch only as long as it takes the muscle to RELEASE TENSION.
- Remember to BREATHE! Too many times, we don’t breathe through a stretch. Breathing helps you focus, and helps your body relax into the stretch.
- You don’t have to perform every stretch listed here. So no matter the stretches you choose for your program, run through them at least twice.
THE LOWER BODY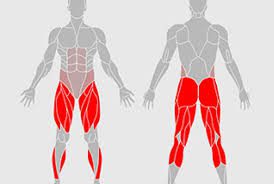
The Feet
Toe Scrunch: With shoes & sox off, stand comfortably with feet shoulder width apart. Curl your toes in and straighten them out. Do this a few times to loosen them up
Toe Balance: With shoes & sox off, kneel on the floor with your feet under you. Sit back on your heels, with your toes pointed downward (soles perpendicular to the floor). GO SLOW! Try sitting on your heels for a count of 5, then come forward. This stretch helps open the muscles in the soles of your feet.
Additional Stretches from Healthline.
The Shins
We tend to forget the front of our lower legs. While you’re kneeling (with shoes & sox off), come up and allow your feet to lay flat so the tops of your feet are laying on the floor. Now, sit back on your heels. You should feel the shin stretch to the point of gentle tension.
Additional Stretches from Very Well Fit.
The Calf
Stretching the calf muscles may be the most important stretch you can do for yourself. The back of your lower leg has two muscles: the Soleus and the Gastrocnemius. Stretching both in one movement is pretty simple. However, it is extremely important that BOTH HEELS REMAIN FLAT TO THE GROUND.
Short: Stand comfortable and move one foot forward about 1-2 steps. Shift your weight back and bend your back knee as if you were about to sit. Stay tall being careful not to bend forward. You should feel a stretch at the lower part of your calf. Stretch to the point of gentle tension, allowing the muscle to release.
Long: Shift weight forward, bending the front knee. You should begin to feel a stretch in the upper part of your calf. Keep your weight forward and your hips back. You should be positioned at a 45 degree angle
NOTE: You can also do this stretch against a wall. Remember to keep your hips at an angle for the stretch to work properly.
Additional Stretches from Medical News Today with and without bands.
The Quadricep
The front of your thigh is the largest muscle and is actually made of four muscles, hence the name “Quad”. There are a few different ways to stretch your quad. Here are two and are in be this link from Very Well Fit:
Standing Quad Stretch: Stand comfortably. Bend a knee back (think of a butt kicker) and catch your ankle with your hand so that you area standing on leg. Do not grab the foot. Feel free to use a doorway, chair or other stable item to help your balance. PAY ATTENTION TO FORM! A couple of rules:
- Keep your knees in line with each other. Do not pull the stretched leg outward. This causes unnecessary torque on your knee and can contribute to injury.
- Stretch to the point of gentle tension. Allow the muscle to release tension naturally.
- Hold the same leg with the same arm.
Lying Quad Stretch
This pose is similar to the Standing Quad Stretch, but on the floor.
Lay on your side and fold the knee back, holding on to your ankle or lower leg. If you feel tension immediately, move the stretching leg forward until you fee no tension. Now, pull the leg back until the point of gentle tension. Hold the position long enough to for the muscle to release and relax.
The Hamstring
Just as in mobility exercises, the hamstring is best stretched in a sitting position. Siting ensures the muscle is not activated during the stretch.
Sitting: Sit on the floor with legs outstretched. Bend one knee to the point it falls to the side. Your foot should be pointed toward or flat against the remaining leg. Using your arms as support, move your torso backward until you feel no tension. Stay upright. Now, move your arms and torso forward until the point of gentle tension. STAY UPRIGHT. Do not fold your torso forward. Once you find the proper tension, allow the muscle to relax naturally.
NOTE: You should not feel tension behind your knee. If you do, move your arms and torso backward, staying upright, until you feel tension in the hamstring (a few inches above the knee). Move the outstretched leg out by about 3 inches or in by about 3 inches to stretch the entire hamstring.
Lying on Back:
Find a towel or band to assist you in this stretch. Lay on the floor with one knee bent and the opposite leg straight in the air. Place the towel or band around the arch of your raised foot. Now, gently pull the towel toward you, allowing your leg to come back toward your head. Again, you may feel tension in the knee fist. If so, back off the stretch until you feel tension in the muscle. Allow the muscle to relax naturally.
Additional Stretches and a NOTE: The stretches above are explained within this link from Medical News Today. You can also stretch your hamstrings from a chair. At this time, MissionFit doesn’t recommend the last two standing hamstring stretches in this link. Talk with your medical provider to find out if these stretches are right for you.
The Hip & Glutes
Pigeon is a great stretch for the glutes (butt) and hip area. There are two ways to stretch in Pigeon:
Standing Pigeon: This pose requires balance, so if your’s a little off kilter, find a doorway or chair to help you stabilize. Stand in a comfortable position. Fold one leg across the other knee. Now, shift your weight down and back. Keep your hips at a 45 degree angle.
Floor Pigeon: Start in a lunge position with your back knee on the floor. Shift your weight forward until your front leg folds underneath you and your body weight is laying on the front leg. Your front foot should be pointing to the opposite leg (or in that direction).
NOTE: Can’t quite get to pigeon? Try this modification from WodPrep. This link contains 3 drills. The first drill is a modification of pigeon.
“Baby” Stretch or Figure 4 Stretch:
This stretch is designed to help open the glutes and the external hip area. Lay flat on your back. Bend both knees to a comfortable position. Cross one leg over the opposite knee so the leg is resting on the thigh, just below the knee. There should be no tension in the raised leg. IF YOU FEEL TENSION, extend the bent knee out until you no longer feel tension.
Next, move the bent knee toward you to the point of gentle tension in the hip and glute area of the raised leg. Your foot should be closer to you. IF YOU FEEL TENSION, allow the muscle to relax naturally. IF YOU DO NOT FEEL TENSION, lift your bent knee and place your hands around the thigh that is bent. Gently pull the thigh closer to you to the point of gentle tension. If you cannot reach around your thigh with your hands, use a towel or band to assist you.
NOTE: There is no need to lift the resting leg if you feel tension by moving your resting foot in toward you.
Additional Hip & Glute Stretches from Healthline for variations of these and other hip & glute stretches.
TORSO 
The Back & Abs
Cat/Cow:
This is a common yoga pose. Start with all fours on the floor – hands under shoulders, knees under hips, feet relaxed. Pull your abs upward, rounding your back. Then relax the abs and allow your back to drop toward the floor, lifting your heading to look up naturally. Do not force your head upward.
Child’s Pose
Another common yoga pose. Kneel on the floor then sit back on your heels with your feet flat on the floor. This is a similar starting position to the shin stretch. place your hands on the floor in front of you and and inch slowly forward, allowing your torso to bend until your chest rests against your thigh.
Cobra:
Another common yoga stretch. Lay on the floor in a prone position. Place your hands next to you and near your armpits. Your elbows should be bent and back, as if you were doing a push-up. Gently raise your torso by pushing against the floor with your hands. Try to keep your hips on the floor. In this stretch, height is not important. So don’t think you have to straighten your arms.
Additional Stretches for variations on Back Stretches from Medical News Today and on Ab Stretches from Healthline.
THE UPPER BODY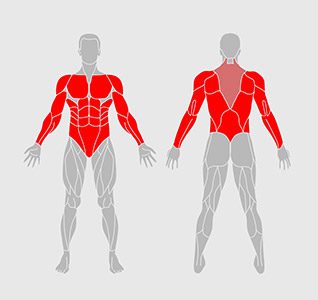
The Chest
Bent Arm on Wall: Stand next to a door frame or pillar. Raise the arm closest to the door frame up and at a right angle, bending at the elbow, hand flat on the surface. Now shift your weight forward or take a small step forward to the point of gentle tension.
Straight Arm on Wall: Similar starting position. However, raise the arm straight out to your side, with your hand flat on the surface. Now turn your body slowly away from your arm. Stop when you reach the point of gentle tension. Allow the tension to release naturally.
Additional Chest Stretches from ACE Fitness .
The Shoulders & Arms
Shoulder One Arm Standing: This is the basic shoulder stretch. Stand comfortably with arms raised to shoulder height. Pull both shoulders back BEFORE crossing one arm to the opposite shoulder. Place the other hand around the outside of and on the arm ABOVE the elbow. Pull toward your chest to the point of gentle tension and allow the muscle to relax naturally.
NOTE: Allow your shoulder to drop away from your head. DO NOT “turtle” your shoulder into your neck while completing stretch.
“Shoulder Blast”
Taken directly from Essentrics this trademark routine, “Shoulder Blast”, is designed to help ease tension and relieve pain in the shoulders. The video in this link is about 15 minutes in length. Watch it through before trying the movements.
Forearms & Wrists
This short video offered by The Mayo Clinic will take you through some of the more common forearm and wrist stretches. These exercises are great if you use a computer regularly.
The Neck
This article from WebMD will take you through the most common stretches for relief of tension in the neck. These include Front & Back Tilt, Side Tilt & Side Rotation and Shoulder Roll.
NOTE: DO NOT USE YOUR HAND TO PULL YOUR NECK TOWARD YOUR SHOULDER OR FORWARD OR BACK. You are stronger than you think you are and can easily injure yourself.